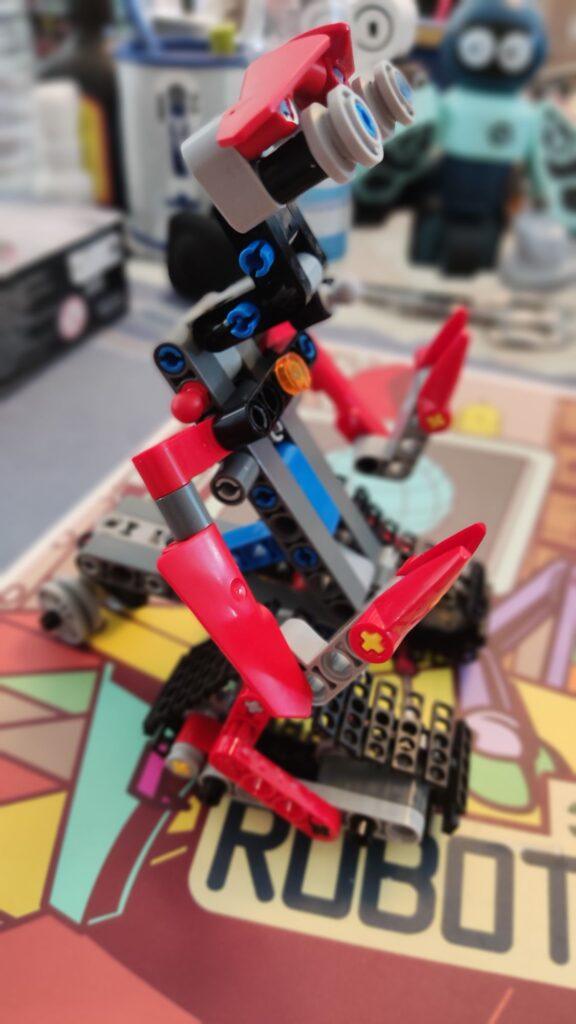
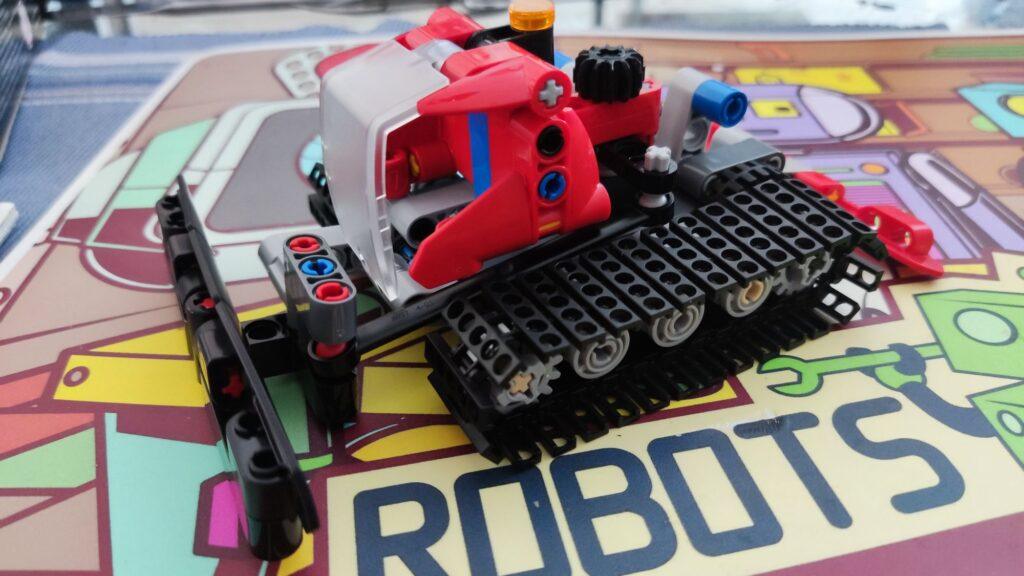
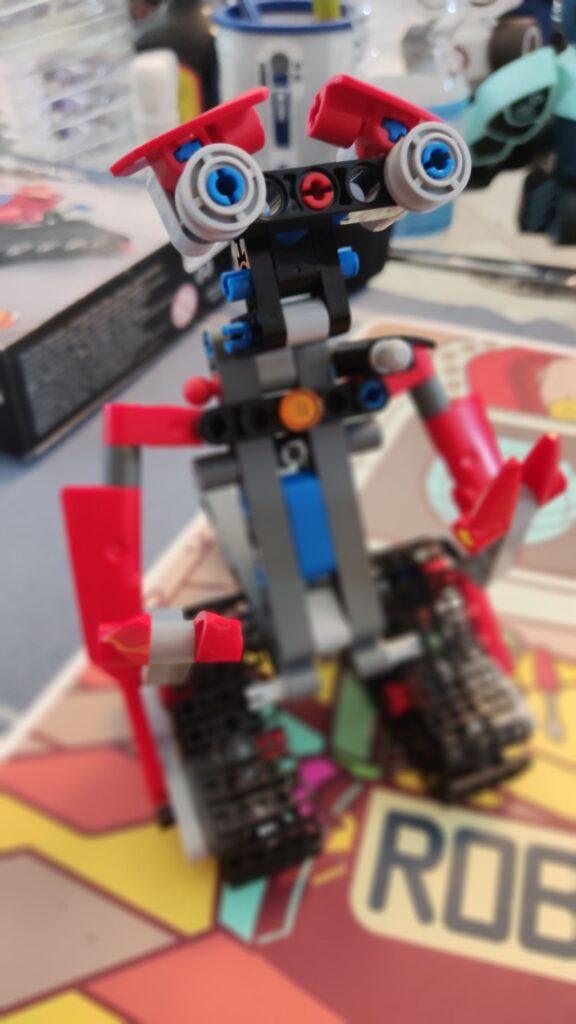
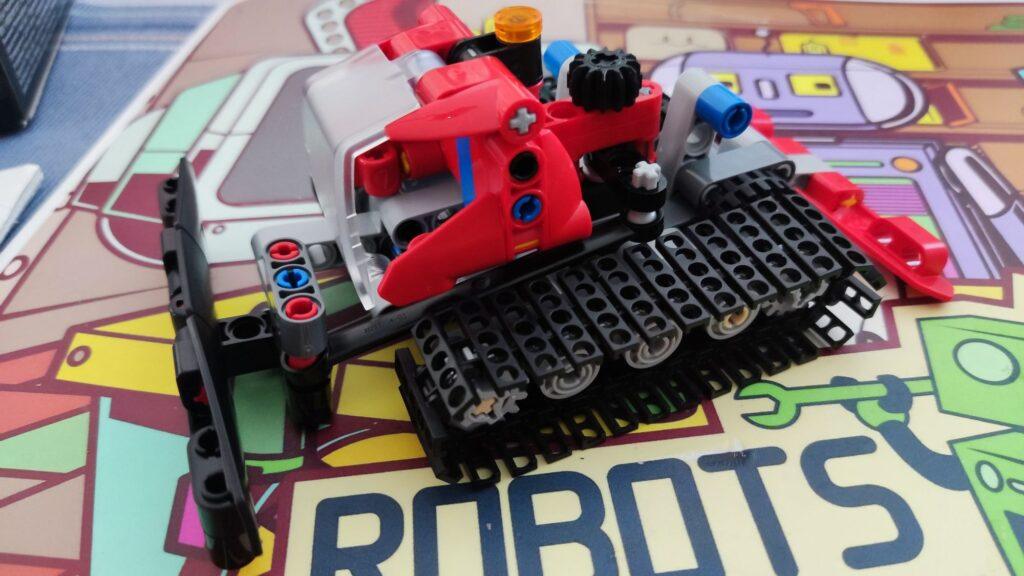
Block coding for all modern LEGO® hubs

Endless creativity and fun with smart LEGO® bricks using Pybricks

November, 2023 – Pybricks Headquarters: Today, the Pybricks team presents the first beta release of block coding for all modern LEGO® hubs. For the first time, fans of all LEGO themes can bring their smart bricks together in a single app for endless possibilities and creativity.

Whether you want to make smart train layouts, autonomous Technic machines, interactive BOOST creatures, or super-precise SPIKE and MINDSTORMS robots, you can do it with Pybricks.

Pybricks is beginner-friendly and easy to use. There’s no need to install complicated apps or libraries either. Just go to https://beta.pybricks.com, update the firmware, and start coding.

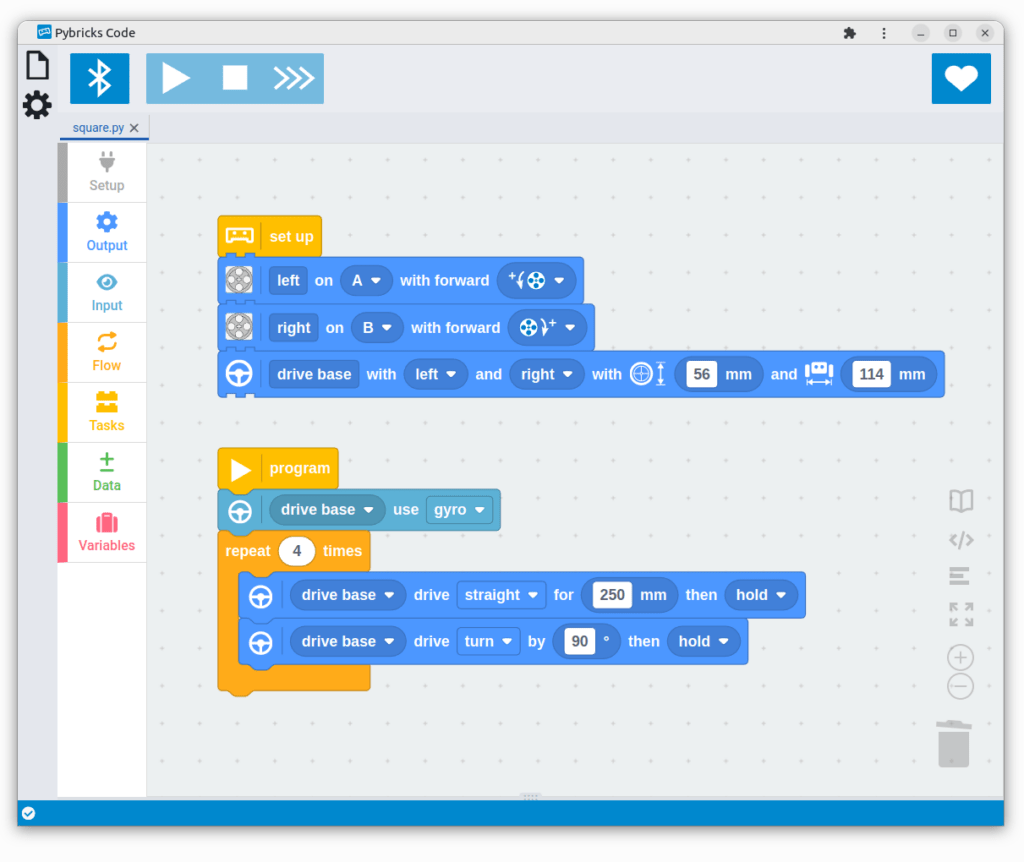
And now for the first time, no prior Python coding experience is required. You can code with familiar but powerful blocks, and gradually switch to Python when you’re ready. The live preview makes it easy to see how your blocks translate to Python code.

Meanwhile, more seasoned builders and robotics teams will enjoy advanced features such as color sensor calibration or builtin gyro control for drive bases.

The new block coding experience is exclusively available to our supporters on Patreon. You can sign up for a monthly subscription or make a one-time pledge in our shop for lifetime access.

Python coding remains entirely free and open source, and continues to be supported by a community of developers and LEGO enthusiasts around the world. Improvements are made almost every day, with the lead developers actively engaging with the community for ideas, bug fixes, and brand new features.

So grab your LEGO sets and start coding!

Coole Erfindungen, packende Wettkämpfe, faszinierende Shows  – Die Maker Faire Hannover – das etwas andere Familienfestival

Es ist wieder Maker-Zeit: Am dritten August-Wochenende, am 19. und 20. August, treffen sich wieder die Macher von morgen im HCC, um ihre spannenden Ideen und beeindruckenden  Erfindungen vorzustellen. „The Iron Horse“, ein riesiges aus Eisenplatten konstruiertes Pferd, auf  dem eine Ballerina tanzt, ist der Top-Act auf der Maker Faire Hannover. Die spanische  Theatergruppe Antigua i Barbuda ist mit dem Pferd zum ersten Mal Gast auf dem etwas anderen  Familienfestival, das sich als bunter Mix aus Messe, Wissensplattform und Jahrmarkt versteht. Zu  dem Event erwarten die Veranstalter rund 1.000 Maker, 200 Stände und 15.000 Besucher.  

In drei Ausstellungshallen sowie im Außenbereich zeigen die Selbermacher, an welchen  faszinierenden Projekten sie in ihren Werkstätten gearbeitet haben. Die Palette ist breit: Zu sehen gibt es fahrende Roboter, blinkende Kleidung, Lego-Kunstwerke, verrückte Computerbasteleien,  außergewöhnliche Licht- und Soundinstallationen, Lasercutter und 3D-Druck, etwas andere  Handwerkskünste oder kuriose Neuigkeiten aus dem Modellbau. 

Ein echter Hingucker ist auch der knapp drei Meter hohe Schlagzeug-Roboter, den der Maker und  Musiker Quentin Thomas-Oliver aus Texas zur Maker Faire mitbringt. Gemeinsam mit seiner  Partnerin Hilary begleitet Quentin die Roboter-Percussion mit den klassischen Instrumenten Cello  und Bratsche und bietet den Zuhörerinnen und Zuhörern einen Musikgenuss der besonderen Art. 

Zu den weiteren Attraktionen – insbesondere für Star-Wars-Fans – zählen auch in diesem Jahr die  originalgetreuen R2D2-Nachbauten des R2-Builders-Clubs sowie die packenden  Kampfroboterduelle der bekannten Mad Metal Machines.  

„Auch zur 9. Maker Faire Hannover haben wir wieder ein vielfältiges Programm auf die Beine  gestellt und bieten der Maker-Szene eine Bühne für ihre zukunftsweisenden Ideen. Wir freuen uns  sehr, mit Jorà Ferré und der Gruppe ‚Antigua i Barbuda‘ aus Barcelona ganz besondere Künstler  gewonnen zu haben, die mit ihrem riesigen Eisenpferd und einer Show mit Musik und Tanz ein  absoluter Besuchermagnet sind.“ 

In der Dark Gallery gibt es ebenfalls neue Maker-Projekte zu bestaunen. Hier ist insbesondere die  spektakulär illuminierte und sich langsam drehende Murmelbahn „Marbles“ in einer Gesamtlänge  von 60 m, und einer Höhe von 3,50 Meter des niederländischen Lichtkünstlers Gertjan Adema zu  erwähnen. 

Der humanoide Roboter „Klara Robot“, selbst konstruierte Saiten-Musikinstrumente, die es so  nicht im Handel zu kaufen gibt, eine induktive E-Auto-Ladestation, die hilft Ladeprozesse von E Autos zu vereinfachen oder das Upcycling-Projekt „Ventilkappenfantasy“, bei dem ausrangierte Gegenstände zu stylischen Fahrradaccessoires umgebaut werden: das sind nur vier Ideen von  hannoverschen Bastlern und Makern, die dieses Jahr das erste Mal auf dem bunten DIY-Festival  ausstellen. Zudem sind aus Hannover der Lobomat, ein Automat der Lob auf Knopfdruck  ausspuckt, das Zukunftsmobil der Uni Hannover, die Silberbilder des Fotografen Thilo Nass und  der Robotik-Podcast dabei. 

Eine Maker Faire heißt nicht nur staunen, sondern auch Lernen, Fachsimpeln, Netzwerken,  Ausprobieren und vor allem Selbermachen. Für den wissbegierigen Nachwuchs ist die Maker Faire  ein Ort für spielerisches Lernen. MINT-Themen werden hier kreativ vermittelt. Die Hacker School  aus Hamburg bietet Workshops, in denen Kinder programmieren lernen, und Maker Jan  Klingenberg zeigt, wie sich auch schon die Kleinsten mit einer Dosengitarre ein Musikinstrument bauen können. Darüber hinaus findet am Samstag wieder ein Lehrertag statt, an dem Maker Inhalte für den Unterricht vorgestellt werden.  

Das YouTuber-Panel mit bekannten und einflussreichen Makern aus der Handwerk-Szene, darunter  erstmals die Schreinerin Julia Maria Spielvogel, gibt ebenfalls Impulse zum Nachahmen.  

Übrigens: Wie in den Jahren zuvor haben Cosplayer, Steampunker und Star-Wars-Fans in ihren  Kostümen freien Eintritt, um die Maker Faire noch ein bisschen bunter zu machen.  

Die Maker Faire im HCC ist am Samstag von 10 bis 18 Uhr und am Sonntag von 10 bis 17 Uhr  geöffnet. Familientickets gibt es ab 28 Euro, die Tickets können online gebucht werden, auch an  der Tageskasse kann nur bargeldlos bezahlt werden. 

Infos und Tickets zum bunten DIY-Familienfestival gibt es unter www.maker-faire.de/hannover

Cherry Tart: The Interactive & LEGO-compatible crafting Nature-Inspired robot kit for kids & adults to innovate

Inspired by Nature, Crafted by You

Are you ready to add a little spark of creativity and innovation to your life? Look no further than Cherry Tart – the first crafty sound-activated, bio-inspired building block kit for kids and adults. We believe that learning and fun should go hand in hand. And with Cherry Tart, that’s exactly what you’ll get.

Introduction

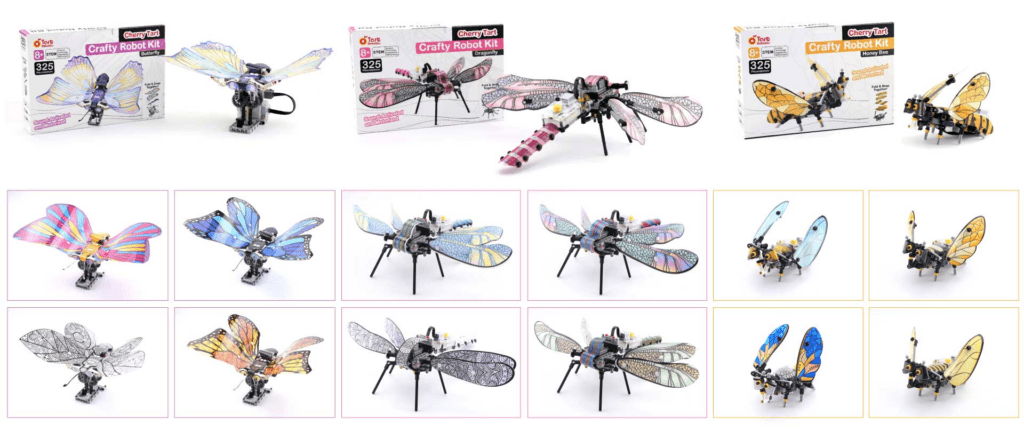
The Cherry Tart crafty series are designed to spark creativity and imagination with a hands-on STEM robot kit for future innovators. A combination of colorful LEGO-compatible building blocks with customizable skins creates a joyful and creative challenge for kids & adults. This kit provides nature’s beauty, enjoyment of design and building, and art. Cherry Tart crafty kit is a LEGO®-compatible and coverable building block that offers an innovative sound activation method to make your nature-inspired projects interactive and livelier.

With this kit, you can create your own interactive, nature-inspired projects that come to life through sound activation. Whether you’re a seasoned robot builder or just starting out, Cherry Tart offers something for everyone.

Crafty robot kit benefits

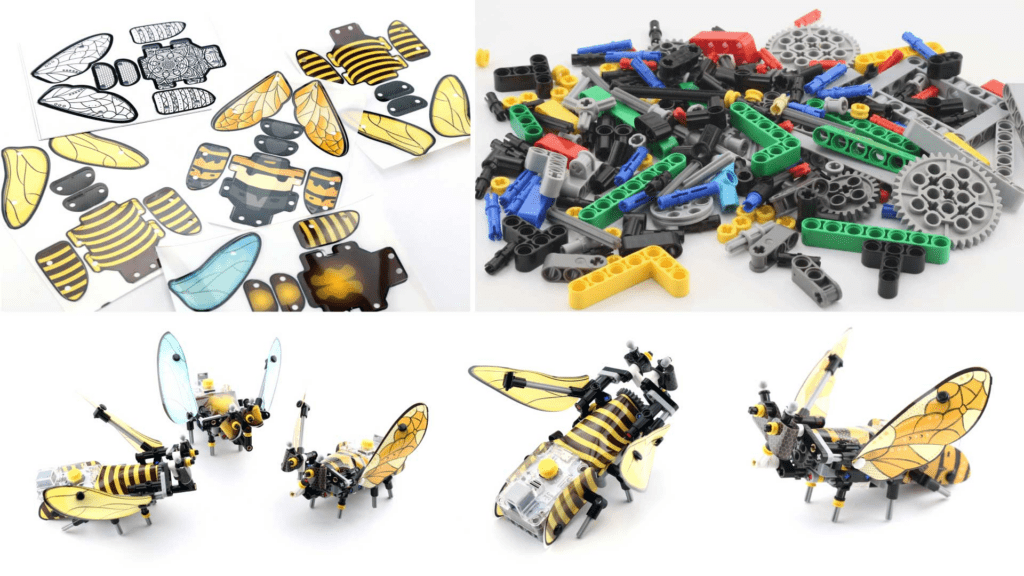
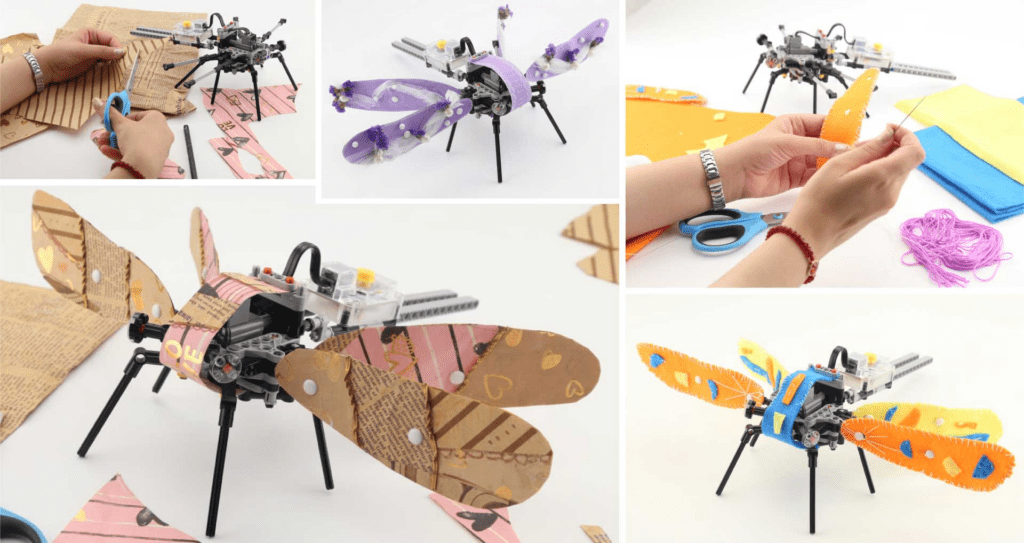
The Cherry Tart crafty kit is not only LEGO®-compatible but also coverable with a wide range of foldable and customizable skins that allow for personal expression. You can cover your model with printed skins or paint and decorate your own skin. The result is an elegant conversation piece that’s a tasteful addition to any home, or maybe just to impress your friends and family.

What you can build?

With Cherry Tart, you can create your own robot designs and program them to move, react to their environment, and even play games. The robot kit is easy to assemble and can be customized with your own crafts and materials, making it a great way to learn about robotics and unleash your creativity. Kids & adults can build sound-activated creatures. It actively involves the kids and encourages them to take physical action. Build the main model using LEGO-compatible building blocks. Select your favorite skin or paint your customized skin, take it out from the printed skin sheet, and snap them on your model. Turn the Cherry Core ON and select your desired mode. Surprised! The model comes to life. Change your model skin and try another one.

What’s Included?

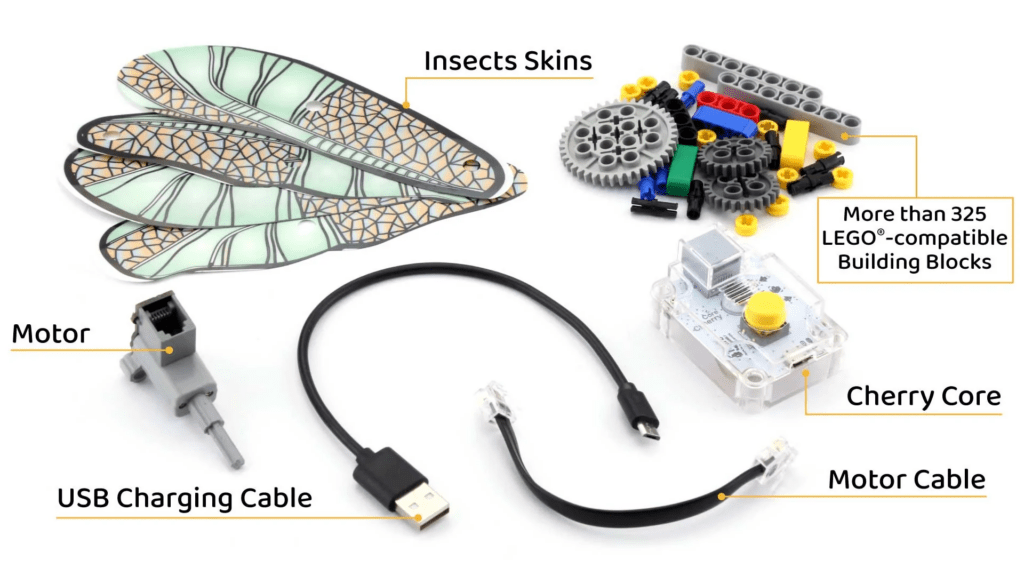
Cherry Tart teaches kids and adults about robotics in a fun and engaging way. The kit includes everything you need to build your own robot and bring it to life, including a Cherry Core sound-activated microcontroller with a built-in rechargeable battery, a motor, LEGO®-compatible building blocks, and different printed and customizable skins.

Coming soon on Kickstarter

After running two successful Kickstarter campaigns, Cherry Tart is back with a new, amazing, affordable product. Back the Kickstarter campaign and be one of the first to get your hands on the Cherry Tart crafty series. This is a great opportunity to support an innovative, educational, and fun product that will spark your creativity and imagination. Let’s build something amazing together!

LEGO Creator Mech 31115

LEGO Creator Mech 31115 Timelapse Build. Find the latest News on robots drones AI robotic toys and gadgets at robots-blog.com. Follow us on our Blog Instagram Facebook Twitter or our other sites. Share your robotics ideas and products with us. #robots #robot #omgrobots #roboter #robotic #mycollection #collector #robotsblog #collection #botsofinstagram #bot #robotics #robotik #gadget #gadgets #toy #toys #drone #robotsofinstagram #instabots #photooftheday #picoftheday #followforfollow #instadaily #lego #mech

A brickobotik tinker project: the SPIKE breakout board

Guest Post by brickobotik:

LEGO Education ’s SPIKETM Prime is available on the market for more than one year by now. In our big test series, we presented in to you in detail. The Inventor 51515 which is the SPIKETM ’s home version, can also be bought by now. The software of both robots has reached a decent level. Earlier this year, we published our own e-book for the SPIKETM Prime Software that can be a helpful resource for everybody who still has questions about programming this robot. For people who like paperbacks more than digital e-books, we also sell it as a print-on-demand paperback on amazon.

At brickobotik, we nevertheless continue to work with the SPIKETM Prime. On the one hand, we use it in our workshops and teacher-trainings. On the other hand, we are also interested in the electro-technics of the SPIKETM Prime. Therefore, we give you a little insight in our „briokobotik craft corner“ and present a little project on which we currently work.

An adapter board for the ultrasonic sensor

Many of you probably noticed the two Torx screws on the back of the ultrasonic sensor in the SPIKETM Prime and the Mindstorms Inventor set which you can ‚t find on the other sensors. If you unscrew these two screws, you can remove the white ultrasonic sensor device so that only the black shell remains in your hand. Here, the cable of the LEGO Powered Up connector ends up in a female header. This 8-pin female header has a pitch of 1.27 mm which cannot be accessed easily with conventional Arduino cables. That is why we decided to develop an adapter that breaks out the 1.27 mm pitch to 2.54 mm which is the conventional dimension of the Arduino, perfboards, breadboards etc.

Technical details about the breakout board

There are six signals within the Power Functions 2.0 connection:

1x 3.3 V power supply
1x GND

 2x digital in-/output (GPIO), which can also be used for UART (115200 Baud, 8N1) Please note: The GPIOs do not supply enough current to operate the LEDs directly! A transistor circuit is necessary to supply an LED from the 3.3 V rail.

 2x PWM for the motors

Please note: The voltage of these signals is supplied directly by the SPIKE ’s battery! Aocording to our measurements it is between 8.4 V and 6.3 V.

Each GPIO signal is provided with a resistor in series that provides a minimal protection against wrong GPIO configurations. They can easily be bypassed with a solder bridge.

On the left and right side, the same signals are spread out. On one side, you find the two GPIOs together with the power rails and on the other side, you find the PWM signals with the power rails. The signal lines to the left and right do not only fan out to contacts of

2.54 mm pitch but also to contacts of 2.00 mm pitch for the Grove connector system.

The respective 3.3 V power supply lines are by default open solder bridges. In this way, two independent power supplies will not compete destructively if for example a Calliope mini or other microcontroller is used. The open solder bridges can be closed with a bit of solder if required.

New possibilities with the breakout board

With our breakout board, connecting and using other sensors and motors with the SPIKETM Prime becomes much easier. It also opens the possibility of connecting the SPIKETM to a microcontroller like the Calliope mini. But you should note one important constraint: projeots like these are primarily suitable for advanced users. The wiring as well as the programming needs experience with the electronics and the respective sensor protocols.

Technical details about the control

The Powered Up signals are directly controllable via the SPIKETM Prime app but only using Python projects and on one’s own account. There is no „UltrasonicBreakout“ Python module or something similar by LEGOO . Nevertheless, descriptions and instructions for the respective MicroPython classes and methods can be found in the internet. People with experience with other MicroPython devices, especially with operating the MioroPython REPL, can quickly familiarize with the necessary details.

Order your own adapter board!

At briokobotik, we are going to continue to work with the adapter board and test its conneotion to different sensors. But we would also like to give the possibility of experimenting with connections to the SPIKETM Prime to all other home constructors and electro-technios enthusiasts who like to try it themselves. So, if you are interested in this adapter board and would like to purchase it, just send us an email to [email protected]. We will collect all requests and if there are enough people interested, we will inform you via email about the possibility of preordering the adapter board.

You don ‚t want to tinker but you are interested in a certain sensor that could be conneoted to the SPIKETM Prime? Visit our website at www.briokobotik.de and leave a oomment or a message with your requests for future projects and we will try to take them into account.

Lego Mindstorms Robot Inventor/Spike Prime (51515/45678) Adapterplatine für den Ultraschallsensor

Gastbeitrag von brickobotik:

Der SPIKETM Prime von LEGO Education ist inzwischen seit über einem Jahr auf dem Markt. Wir haben ihn euch in unserem großen Test ausführlich vorgestellt. Inzwischen ist auch der Inventor 51515 also die Home-Variante des SPIKETM Prime erhältlich. Bei beiden ist die Software nun auf einem adäquaten Level angekommen. Inzwischen haben wir auch unser E-Book zur SPIKETM Prime Classroom-Software veröffentlicht, das für alle, die noch Fragen zur Programmierung der Roboters haben, definitiv einen Blick wert ist.

Für uns bei brickobotik geht die Arbeit mit dem SPIKETM Prime aber trotzdem weiter. Zum einen natürlich in unseren Workshops und Fortbildungen, die wir zu diesem Roboter durchführen. Aber auch die Elektrotechnik des SPIKETM beschäftigt uns. Deshalb geben wir euch in diesem Artikel einen kleinen Einblick in unsere „brickobotik-Bastelstube“ und stellen ein Projekt vor, an dem wir gerade arbeiten.


Viele von euch ist sicher aufgefallen, dass der Ultraschallsensor von SPIKETM Prime und Mindstorms Inventor im Gegensatz zu den anderen Sensoren auf seiner Rückseite zwei Torx-Schrauben zeigt. Wenn man diese herausschraubt, kann man die weiße Sensoreinheit des Ultraschallsensors entfernen und hält dann nur die schwarze Schale in der Hand. Darin kommt das Kabel des LEGO Powered-Up-Steckers an und wird auf eine Buchsenleiste verteilt.

Diese Buchsenleiste (es handelt sich um einen 8-Pin Female Header) ist mit einem Rastermaß von 1,27 mm sehr klein und es kann deshalb ziemlich fummelig werden, sie mit herkömmlichen Arduino-Kabeln zu nutzen. Darum haben wir eine passende Adapterplatine entwickelt, welche die kleine Buchsenleiste auf das typische Rastermaß von 2,54 mm übersetzt, wie man es vom Arduino, Steckbrettern, Lochrasterplatinen, etc. kennt.

Technische Details zur Platine

Die Power-Funotions-2.O-Verbindung führt sechs Kontakte:

1X 3,3 V Spannungsversorgung
1X GND
2 digitale Ein-/Ausgänge (GPIO), welche auch für UART (115200 Baud, 8N1) verwendet werden können.
Achtung! Die GPlOs liefern nicht genug Strom, um LEDs direkt zu betreiben! Es wird eine Transistorschaltung benötigt, um eine LED aus der 3,3 V Spannungsversorgung zu speisen.

2x PWM für Motoren

Achtung! Die Spannung dieser Signale kommt direkt vom Akku des SPIKETM Prime! Diese liegt nach unseren Messungen zwischen 8,4 V und 6,3 V.

Für die GPlO-Kontakte ist auf der Platine je ein Widerstand vorgesehen, welcher einen minimalen Schutz gegen falsche GPlO-Konfigurationen darstellt. Sie können aber auch einfach überbrückt werden.

Nach links und rechts sind die gleichen Kontakte noch einmal ausgeführt. So sind auf der einen Seite der Platine die GPlO-Kontakte mit Spannungsversorgung ausgeführt und auf der anderen Seite die PWM-Kontakte mit Spannungsversorgung – und zwar sowohl im Rastermaß 2,54 mm als auch im Rastermaß 2,00 mm für das Grove-Stecksystem. Für die Kontakte links und rechts ist die Spannungsversorgung von 3,3 V durch eine offene Lötbrücke unterbrochen, damit zum Beispiel bei Verwendung eines Calliope mini die unabhängigen Spannungsversorgungen beider Geräte nicht zerstörerisch konkurrieren. Die offene Lötbrücke kann bei Bedarf mit etwas Lötzinn geschlossen werden.

Neue Möglichkeiten durch die Platine

Mit der Platine ist es deutlich einfacher, weitere Sensoren oder Motoren anzuschließen und mit dem SPIKETM Prime zu nutzen. Auch eine Verbindung zu Mikrocontrollern wie dem Calliope mini ist möglich. Aber es gibt eine wichtige Einschränkung: Solche Projekte sind eher für fortgeschrittene Nutzer*innen geeignet. Sowohl die Verdrahtung als auch das Programmieren erfordern Erfahrung mit der Elektronik und den entsprechenden Sensorprotokollen.

Technische Details zur Ansteuerung

Das direkte Ansteuern der Kontakte funktioniert über die SPIKETM-Prime-App, allerdings nur in Python-Projekten und auf eigene Faust. Es gibt kein von LEGO gestelltes „UltrasonicBreakout“ Python-Modul o.ä. Beschreibungen und Anleitungen zur den entsprechenden Micropython-Klassen und -Methoden kursieren jedoch im Internet. Wer Erfahrung mit anderen Micropython-Geräten, speziell der Bedienung der Micropython-REPL, mitbringt, kann hier schnell Fuß fassen.

Bestellt eure eigene Adapterplatine!

Wir werden bei brickobotik mit der Platine weiterarbeiten, um die Verbindung mit verschiedenen Sensoren zu testen. Allen Bastler*innen, die jetzt Lust bekommen haben, ebenfalls mit Verbindungen zum SPIKETM Prime zu experimentieren, möchten wir die Möglichkeit geben, unsere Adapterplatine dafür zu nutzen. Wenn ihr also Interesse an der beschriebenen Platine habt und sie über uns erwerben wollte, dann schreibt uns eine E-Mail an [email protected]. Wir sammeln die Anfragen und wenn genügend Interessent*innen zusammenkommen, geben wir euch per Mail Bescheid, sobald die Platine vorbestellbar ist. Du willst nicht selbst basteln, bist aber interessiert an einem bestimmten Sensor, den man mit dem SPIKETM Prime verbinden könnte? Dann besuch uns auf www.brickobotik.de und lass uns einen Kommentar oder eine Nachricht mit deinen Wünschen da. Wir werden versuchen, sie für kommende Projekte zu berücksichtigen

MindCuber-RI uses LEGO Mindstorms Robot Inventor 51515 to solve Rubik’s Cube

MindCuber-RI is a robot that can solve the well-known Rubik’s Cube® puzzle. It is designed by David Gilday and Mike Dobson.


It is built using elements from a single LEGO® MINDSTORMS® Robot Inventor set 51515.

MindCuber-RI is significantly faster than previous MindCuber and PrimeCuber designs because it makes use of the fourth motor available in the Robot Inventor set to implement a faster tilting mechanism. Older MINDSTORMS and SPIKE Prime sets only included three motors.

Building instructions and software are now available on http://mindcuber.com/mindcuberri/mindcuberri.html alongside those for MindCuber for LEGO MINDSTORMS NXT, MindCub3r for LEGO MINDSTORMS EV3 and PrimeCuber for LEGO Education SPIKE® Prime.

Crowbits Launches Creative Electronic Blocks For STEM Learning on Kickstarter

Thanks to Elecrow, parents who are looking to interest their children in some fun but educational activities can now do precisely that with Crowbits, electronic lego blocks that have been centered around STEM education.

With the Elecrow campaign for Crowbits achieving outdoing its original goal by a mile, it appears that many parents and guardians have recognized the potential of the electronic blocks. With Crowbits, children can learn some of the most in-demand digital skills in the world while having fun. Some of these perks of playing with Crowbits include graphical programming, python programming, hands-on STEM learning, endless ways to use the electronic blocks, and their compatibility with lego.

A few parents and backers have identified Crowbits as the perfect gift item for their wards. By connecting the electronic blocks together, kids can create fully-functional gaming consoles, phones, tech-savvy cars, radar systems, machinery, and more with no coding required.

Crowbits is based upon Arduino, ESP32, Micro:bit Programmable STEM education blocks for kids. These are little magnetically linked blocks that snap together when joined. The system also incorporates Letscode, a graphical programming software where users simply drag and drop elements to create new products.

“The way that we see it, STEM is more important than ever before, and we want children to learn about it and practice it. That way, the next generation can progress more quickly onto the more complex topics,” said David Chu of Elecrow.

The Crowbits package includes multiple main controller modules, input modules, and output modules, with over 80 modules to pick from, wherein circuit systems can be created with LEGO-compatible blocks. In all, there are five kits (Hello, Explorer, Inventor, Creator, and Master), and more than 70 PBL lessons.

Students aged 3-14 years old can play with Crowbits and work on projects, solve problems and think creatively in a step-by-step manner. They can mix and match these blocks with their LEGO blocks too. There are three levels of difficulty as well to make learning progressive: Electronics and engineering, computer science, and the Master level for building fully functional products.

Crowbits has been launched on Kickstarter to raise funds and welcomes all donors and participants to help create this novel system wherein children can be taught at an early age to learn science, technology, engineering, and math with fun, while also building their creative imagination.

For more information, please visit: www.elecrow.com

Sparklekits

Kids learn coding with the new Sparklekits, unleashing their creativity through a great building experience.

What is Sparklekits? 

Sparklekits is a STEM kit with a set of modular magnetic blocks & puzzles that promotes educational discovery through open-ended play and hands-on experience using advanced technology. It is extremely easy to assemble and super intuitive to use. It is a better and more fun STEM education tool that integrates building, learning, coding and play.

Advanced Design

Sparklekits breaks down complicated engineering into easy-to-assemble, functional magnetic modular blocks that children can use without using any cables, screws or tools. Kids can’t get it wrong, creating an environment that invites experimentation and creativity while building confidence.

These building blocks are infused with magical, seamless technology that allows kids to code, build, and explore at their own pace. Built-in games and challenges let kids between 5-12 learn through play, and it’s fully LEGO-compatible!

Launching on Kickstarter on 10th Nov 2020

Funding Goal: USD $5,000

Funding Amounts: USD $129.95 to receive one of the first 50 Sparklekits set (shipping APR 2021)